Properly storing your blender is key to maintaining its performance and longevity, ensuring it’s ready for creating delicious soups, smoothies, and other blender recipes in 2025. Whether you’re using an affordable countertop model like the Oster Pro 1200 or a portable blender like the NutriBullet Pro, knowing how to use a blender includes mastering blender maintenance through correct storage. Improper storage can lead to damaged blades, mold growth, or motor issues, disrupting your cooking with blender routine. This beginner-friendly blender user guide provides clear steps to store your blender safely, keeping it in top shape for family meals or quick blends.
In this guide, we’ll cover essential storage preparations, step-by-step instructions, and best blender tips to prevent common issues like rust or odors. From disassembling and cleaning to choosing the right storage spot, you’ll learn how to protect your blender while prioritizing blender safety. We’ll also address blender troubleshooting for storage-related problems, ensuring your appliance stays reliable. By the end, you’ll be equipped to store your best affordable blender properly, extending its life and keeping it ready for your next culinary creation. Let’s dive in!
What You Need Before Storing
Before storing your blender, gather the right tools and prepare your appliance to ensure it remains in top condition. A proper blender setup for storage prevents damage and simplifies future use, especially for family-sized blenders used for soups.
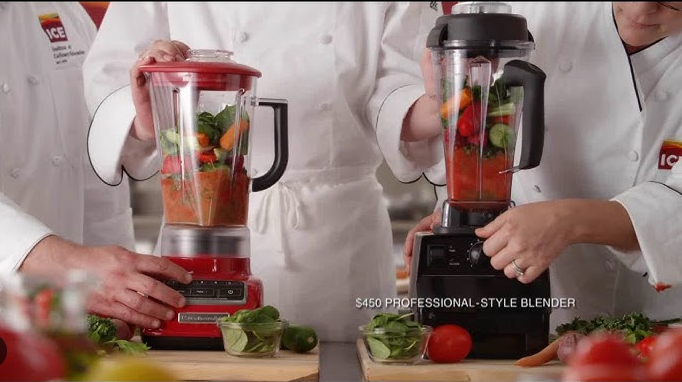
You’ll need a soft cloth, mild dish soap, a small brush (like a toothbrush) for cleaning crevices, and a dry towel. For countertop blenders like the Hamilton Beach Power Elite, ensure the jar, lid, and blade assembly are detachable. For portable blenders like the BlendJet 2, check for travel cups and seals. A storage bag or cover protects against dust, while a screwdriver (often Phillips) may be needed for blade disassembly. Refer to your blender’s manual for model-specific parts—manuals for models like the Oster Pro 1200 detail component care. For blender safety, unplug the blender before handling. If storing after blending hot soups, let parts cool to avoid burns—use heat-resistant gloves if needed.
Choose a storage area that’s dry, cool, and away from heat sources like stoves. A cupboard or pantry shelf is ideal for countertop models; for portable blenders, a travel case works for on-the-go storage. Have silica gel packets or desiccants handy to absorb moisture if storing long-term. Visit blender reviewz for model-specific storage tips. This preparation ensures effective blender maintenance and protects your investment.
Step-by-Step Guide to Storing a Blender
Storing your blender correctly involves cleaning, disassembling, and choosing the right location. This step-by-step guide simplifies the process, focusing on soups but applicable to all blender recipes, ensuring blender safety and preventing blender troubleshooting issues.
Cleaning the Blender
Start with a thorough cleaning to prevent mold, odors, or residue buildup. Unplug the blender and disassemble the jar, lid, and blade assembly. Fill the jar halfway with warm water and a drop of dish soap, then blend on high for 30 seconds—most models like the Oster Pro 1200 make this easy. Rinse thoroughly. For immersion or portable blenders, detach the wand or blade and wash under running water. Use a brush to clean crevices around blades. Wipe the motor base with a damp cloth, avoiding water in vents. Dry all parts completely with a towel to prevent rust. This 5-10 minute step is a best blender tips essential for storage.
Disassembling and Inspecting Parts
Disassemble removable parts to store separately, reducing strain on seals. Remove the blade assembly (use a screwdriver if needed) and check the gasket for wear—replace if torn (gaskets cost $5-10). Inspect the jar and lid for cracks or scratches; damaged parts can harbor bacteria. For portable blenders, ensure travel cups and seals are intact. Clean and dry each component again if needed. This step, taking 3-5 minutes, ensures blender maintenance and prevents future leaks or odors.
Choosing a Storage Location
Store your blender in a dry, cool place away from humidity or heat sources like ovens, which can warp plastic parts. A kitchen cabinet or pantry shelf works for countertop models like the Hamilton Beach. For portable blenders, use a padded travel case for protection. Avoid stacking heavy items on top to prevent jar cracks. Place silica gel packets near the blender for long-term storage to absorb moisture. Ensure the area is dust-free or use a storage cover. This step protects your blender’s longevity.
Storing the Components
Store the jar upside down to avoid pressure on the blade assembly, and keep the lid and tamper (if included) separate to allow air circulation. Wrap blades in a cloth or store in their original cover to prevent dulling or injury. For the motor base, loosely coil the cord to avoid fraying—never wrap tightly. For cooking with blender, keep parts accessible for frequent use, but ensure they’re dry to avoid mold. This organization prevents blender troubleshooting issues like rust or stuck blades.
Testing Before Next Use
Before using your blender after storage, reassemble and test with water on low for 10 seconds to check for leaks or odors. If stored long-term, inspect gaskets and blades for wear—replace if needed (check blender guide for parts). For hot soups, ensure parts are heat-resistant. This quick check ensures your blender is ready for blender recipes like creamy tomato soup, maintaining performance and blender safety.
Tips for Successful Blender Storage
Keep your best affordable blender in top shape with these best blender tips, tailored for soups but versatile for all uses, ensuring blender maintenance and blender safety.
Always clean and dry all parts thoroughly before storing to prevent mold or odors—especially after blending soups with strong flavors like garlic. Store in a low-humidity environment; bathrooms or damp basements can damage components. For blender safety, keep blades covered to avoid cuts during retrieval. Avoid storing near heat sources to prevent warping. For portable blenders, charge batteries fully before long-term storage to maintain power. Regularly check stored parts every 3-6 months for wear or dust buildup. For blender recipes like broccoli soup, reassemble carefully to avoid leaks. These habits extend your blender’s life. For more storage ideas, explore blending tips.
Frequently Asked Questions
Questions about storing your blender? These FAQs address common concerns for blender maintenance.
Can I store my blender assembled? It’s better to disassemble to prevent seal strain and allow air circulation, reducing mold risk.
How do I prevent mold during storage? Dry all parts completely and store in a cool, dry place with silica gel packets for moisture control.
Can I store my portable blender in a bag? Yes, a padded travel case is ideal for portable blenders like the NutriBullet, protecting components during travel.
What if my blender smells after storage? Clean thoroughly and check for trapped residue. If odors persist, replace gaskets or consult blender troubleshooting at blender guide.
Conclusion
Properly storing your best affordable blender ensures it’s ready for soups, smoothies, and more, extending its life and performance. This guide simplifies cleaning, disassembly, and storage, prioritizing blender safety and blender maintenance. With these steps, you can keep your blender in top condition for endless blender recipes. Start storing smartly today and explore more blending tips. Happy blending!