Learning how to sharpen blender blades can breathe new life into your blender, ensuring it performs at its best for smoothies, soups, and more. A blender is a versatile kitchen tool that chops, mixes, or liquefies ingredients with high-speed blades, making it essential for cooking with blender. Dull blades can hinder performance, leading to uneven blends and frustration. This blender user guide will walk you through how to sharpen blender blades safely and effectively, alongside key blending techniques.
Blenders are loved for tasks like how to make smoothie in blender or creating blender recipes such as sauces and dips. This guide covers blender setup, blender safety, blender troubleshooting, and blender maintenance, with a focus on blade sharpening to restore efficiency. Whether you’re using a countertop model or a portable blender, these best blender tips will help you maintain peak performance. Curious about keeping your blades sharp? We’ll show you how.
By mastering how to sharpen blender blades, you’ll extend your blender’s lifespan and enhance your culinary creations. For more resources, check out blender guide. Let’s dive into sharpening your blades and blending like a pro!
What You Need Before Using a Blender
Before exploring how to sharpen blender blades, ensure your blender is ready for use. Proper preparation and maintenance prevent issues and support blade longevity, reducing the need for frequent sharpening or blender troubleshooting.
Required Accessories
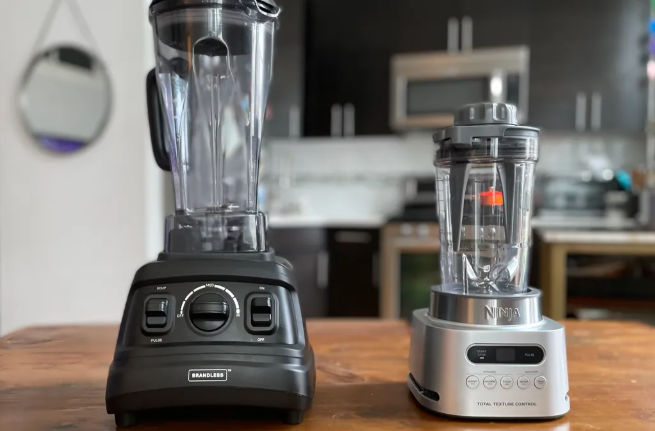
Most blenders include a motor base, blending jar, lid, and sometimes a tamper for guiding ingredients toward the blades. A tamper is useful for thick blends like nut butters or soups. Some models have a vented lid for hot liquids or a measuring cap for adding ingredients gradually, both aiding blender maintenance.
For sharpening blades, you’ll need a sharpening stone or fine-grit sandpaper (800-1000 grit), a screwdriver to remove blades (if detachable), and a cloth for cleaning. For a portable blender, ensure you have a charging cable if battery-powered. Standard blenders require a stable power outlet, so an extension cord may be needed. A soft sponge or brush is essential for cleaning post-use.
Compatibility Check
Verify your blender’s specifications to ensure safe sharpening and use. Jar capacity varies: 20-32 ounces for single servings, like smoothies, or 48-64 ounces for larger batches, like soups. Glass jars are durable but heavy; BPA-free plastic jars are lightweight but check for heat resistance if blending hot liquids.
Power ranges from 300 watts for basic tasks to 1500 watts for heavy-duty blending. For tasks like how to make smoothie in blender with frozen fruit, 600+ watts prevents blade strain, reducing dullness. Check if your blades are detachable for sharpening—some models have fixed blades, requiring professional service.
Safety Requirements
Blender safety is critical, especially when handling blades for sharpening. Read the manual to confirm if blades are removable and for model-specific warnings. Use a grounded outlet to avoid electrical issues and place the blender on a stable surface to prevent tipping during use or maintenance.
Store the blender out of children’s reach and wear protective gloves when sharpening blades to avoid cuts. Safety locks, common in modern blenders, prevent operation if the jar isn’t secure—test this feature to avoid misuse that could dull blades, tying into how to sharpen blender blades.
Basic Preparation
Wash the jar, lid, and tamper with warm soapy water before first use to remove residues. Dry thoroughly to avoid corrosion, especially on blades. Chop ingredients into 1-2 inch pieces to reduce blade strain, supporting blender maintenance. Test the blender empty on low for 5-10 seconds to check for unusual noises, ensuring proper blender setup before sharpening or blending.
Step-by-Step Blending Guide
Proper blending techniques complement how to sharpen blender blades by reducing blade wear. This section provides a step-by-step guide to blending, including troubleshooting and sharpening tips to maintain performance for blender recipes like smoothies and soups.
Preparing Ingredients
Proper ingredient prep reduces blade dulling, supporting how to sharpen blender blades. Wash fruits and vegetables thoroughly to remove dirt or pesticides. For smoothies, peel fruits like bananas or mangoes and remove pits from stone fruits. Cut into 1-2 inch pieces to ease blending—large chunks can dull blades faster.
Thaw frozen ingredients slightly to reduce blade strain. Measure liquids like water or milk carefully, starting with less to avoid thin results. For how to make smoothie in blender, layer strategically: liquids first, then soft fruits, greens, and frozen items or ice. For soups, add broth first, then cooked vegetables. Fill the jar no more than two-thirds for cold blends or halfway for hot liquids to prevent spills.
Setting Up the Blender
Correct blender setup minimizes blade wear. Place the base on a dry, stable counter. Secure the jar by twisting until it locks—listen for a click. Add ingredients, then attach the lid tightly. For hot liquids, use a vented lid to release steam, preventing pressure that could damage blades or seals.
Plug in the blender and review controls. Most have variable speeds, a pulse function, and sometimes presets for smoothies, ice crushing, or soups. Proper setup reduces strain, supporting how to sharpen blender blades by keeping them sharp longer. For more tips, visit blender.
Selecting Modes
Choosing the right mode prevents blade dulling. Use the smoothie preset for creamy blends, cycling speeds to minimize strain. Ice crush mode pulses to break down ice without overheating, ideal for frozen drinks. Soup mode, on high-end models, heats ingredients via friction for cooking with blender.
If no presets, start on low for 20-30 seconds, then switch to high for 1-2 minutes. Use pulse for chunky textures like salsas. Overloading with incorrect modes can dull blades, making how to sharpen blender blades necessary sooner. Never leave the blender unattended on high to ensure blender safety.
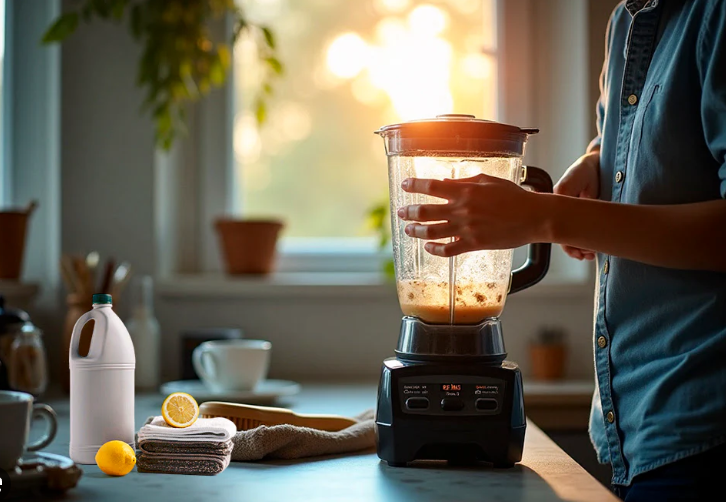
Blending Process
Start on low, then increase speed gradually. Blend for 30-60 seconds for smoothies or 1-3 minutes for soups or nut butters. Use the tamper through the lid’s opening to guide ingredients, avoiding non-tamper utensils to prevent blade damage. If ingredients stick, unplug and scrape sides with a spatula.
Listen for a steady hum—grinding noises indicate a jam, which can dull blades. For hot liquids, ensure the vent cap is open to prevent pressure buildup. Proper blending reduces wear, supporting how to sharpen blender blades by delaying the need for sharpening.
Testing the Blend
Unplug and remove the jar. Pour a sample to check consistency—smoothies should be creamy, soups velvety. If too thick, add liquid and blend briefly. Taste and adjust seasoning or sweetness. If gritty, blend longer on high—grittiness may indicate dull blades, signaling it’s time to apply how to sharpen blender blades.
Troubleshooting and Sharpening Blades
If your blender struggles with blends, dull blades may be the issue. Here’s how to sharpen blender blades safely, plus other troubleshooting tips:
– Check Blade Sharpness: Unplug the blender and remove the jar. If blades are detachable (check the manual), use a screwdriver to remove them. Inspect for dullness—blades should feel sharp to the touch.
– Sharpening Process: Wear gloves. Use a fine-grit sharpening stone or 800-1000 grit sandpaper. Gently rub the blade’s cutting edge at a 20-degree angle, 5-10 strokes per side. Clean with a damp cloth and reassemble. If blades are fixed, contact the manufacturer or a professional.
– Other Issues: If it won’t start, check power and jar alignment. For overheating, unplug and cool for 15-30 minutes. Leaks may indicate loose lids or worn seals—tighten or replace. Clear blade jams safely after unplugging. For more blender troubleshooting, visit blending tips.
Tips for Successful Blending
These best blender tips complement how to sharpen blender blades by reducing blade wear and ensuring optimal performance.
Cleaning Your Blender
Blender maintenance prevents blade dulling. Rinse the jar immediately after use to avoid residue buildup. Fill halfway with warm water, add a drop of dish soap, and blend on low for 30 seconds. Rinse and dry thoroughly. For stubborn stains, scrub blades gently with a soft brush, keeping them sharp longer.
Wipe the base with a damp cloth—never submerge it. Regular cleaning, a key part of how to sharpen blender blades, ensures hygiene and extends blade life, whether using a countertop or portable blender.
Safety Precautions
Blender safety protects blades and components. Always unplug before cleaning or sharpening. Keep hands and non-tamper utensils out of the jar during operation. For hot liquids, cool slightly and use a vented lid to avoid pressure buildup. Check for jar cracks or worn seals regularly to prevent damage.
Energy-Saving Tips
High-powered blenders consume significant energy. Blend in short bursts (1-2 minutes) and use pulse for quick tasks like chopping. For portable blender users, charge only when needed to preserve battery life. Batch-prep ingredients to reduce blending sessions, minimizing blade wear.
Best Blending Practices
Add liquids first, followed by soft items, greens, and frozen ingredients for consistent results. Cut uniformly to ease blending. Avoid mixing hot and cold items to prevent jar damage. Experiment with blender recipes like dips or sauces to maximize your blender’s potential while keeping blades sharp.
Frequently Asked Questions
These answers address concerns related to how to sharpen blender blades and blending issues.
What Happens If My Blender Overheats?
Overheating results from prolonged use or thick mixtures. Unplug and cool for 15-30 minutes. Prevent it by blending in short bursts and layering ingredients properly, as outlined in this blender user guide. Overheating can dull blades, necessitating how to sharpen blender blades.
How Do I Fix Common Blender Issues?
For blender troubleshooting, check power and jar alignment if it won’t start. Clear blade jams safely after unplugging. Leaks may indicate loose lids or worn seals—tighten or replace. If blends are uneven, sharpen blades as described in how to sharpen blender blades.
Do I Need Professional Help for Repairs?
Minor issues like jams or dull blades can be fixed at home with how to sharpen blender blades. For electrical or motor problems, professional repair is safer, especially under warranty. Avoid DIY fixes for complex issues to maintain blender safety.
Is a Portable Blender Good for Travel?
A portable blender is ideal for travel due to its compact size and battery power, perfect for quick smoothies. Check TSA rules for carrying it. For heavy-duty tasks, a countertop model is better, but maintain blades with how to sharpen blender blades for optimal performance.
Conclusion
Mastering how to sharpen blender blades ensures your blender delivers smooth, consistent results for how to make smoothie in blender, soups, and more. This guide covered blender setup, blender safety, blender maintenance, and blender troubleshooting, with a focus on keeping blades sharp. Proper care prevents costly repairs and enhances performance.
Whether you’re using a countertop powerhouse or a portable blender, these best blender tips keep your appliance in top shape. Start with simple blender recipes and blend confidently. For more guidance, visit blending tips. Keep your blades sharp and enjoy seamless blending!